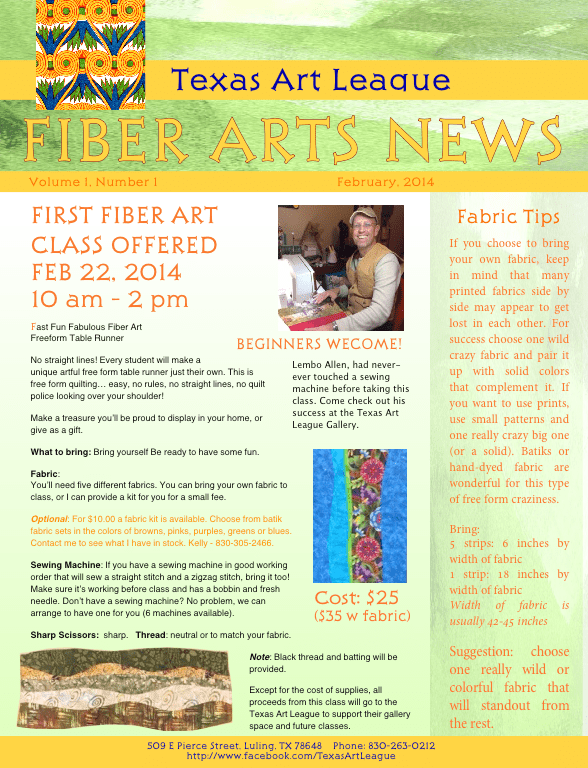
The Free Form Table Runner class being offered Feb 22, 2014 from 10 am to 2 pm. at the Texas Art League Gallery. Sign up at the Gallery. There will be a break for lunch, you can bring your lunch or some students may wish to work on their project so we arrange for lunch from the Coffee Shop, or perhaps a taco run. Iced tea and water available during the class.
Click here for PDF to save and download. For more detailed information, Please click on this image for a pdf you can save and print. This flyer will also be available in the Texas Art League Gallery; and, in the Watermelon Shop next door if the Gallery is closed.
The Gallery has limited hours but is open most afternoons Tuesday – Saturday. They would really appreciate more volunteers who would like docent at the gallery so that it may open more hours of the day.
The Texas Art League Gallery is at at 509 E Davis Street, Luling, Texas 78648.
Tension in the fabric is as important as tension of the thread.
Taut but not too tight is about right. When on the rollers with the rollers locked and ready to quilt, the fabric should deflect with the weight of your hand resting on it, but not much. You don’t want to bounce a quarter like on a soldiers bed, but you do want it firm, it should look smooth.
Sewing techniques can lead to tension issues.
If the fabric is pulled through a machine, or the machine presser foot tension is set differently between seams. The seams created can be “tight” or “loose”. On a quilt back pieced from long lengths to create a stripped effect, sewing improperly can lead to huge problems when mounting on a long arm. I also think sewing on a dry warm day versus a wet humid day can cause some of this. But so can sewing when you are upset with your husband and are working out your tension by escaping to the sewing room. Perhaps even moving from a kitchen table at the beginning of a project to the teensy side table next to the couch can matter (especially when sewing long straight strips.
It matters how you put a bottom on the roller bar
Lots of the issues mentioned above can be overcome by an experienced long-armer. Of course, I didn’t know this being so new to the game. I had to call in my guru, Laurie, who helped me laugh off everything and gave me tips to sort it out. Basically to overcome the tension in the seams issue, it helps to mount a pieced quilt bottom so the longer pieced seams run parallel to the roller bar. If you don’t and the seams roll around the bar, then the fabric essentially double layers wherever the seams overlay each other as they wrap around the bar. This means that the flat areas of fabric can’t lay flat. You’ll end up with tight seams and loose areas between the seams. The loose areas will wrinkle, pucker, and make your life miserable since you will not be able to get even tension on the quilt back.
Simple rule, on pieced backs, mount the back so the long pieced seams are parallel with the roller bar.
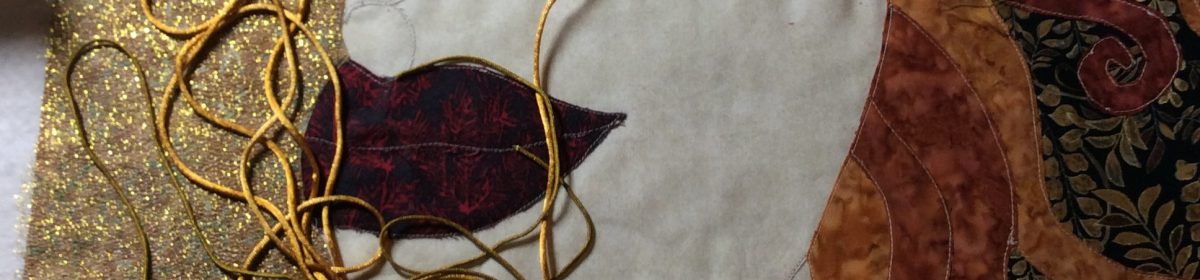
Buying the silk because it was so lovely before I was entirely sure how to work with it meant that it sat around for a long time. The quilting store in Kerrville Texas sold it to me and a lovely lady told me how to stabilize it. She also told me to treat it just like I wanted to before I sewed it together. She said “get it wet before you sew it”. Well I did, I washed it even. Then I tested it. It’s true that if you do this, the silk won’t spot later if it gets wet. I used woolite to wash it. I abused it, put it in my front loader on delicate. However I didn’t dry it, I did hang and air dry it. I ironed it. And then I stabilized it and sewed all over it. Without stabilizing it would have been a nightmare. But the stabilizer kept it from unraveling that much. This is a Christmas present for my Aunt and my Mom volunteered to bind it. She did a great job with the dupioni strips I cut for her. The binding wasn’t stabilized but I did press it with Best Press to make it stiff and hold together some to prevent raveling. And, yes, I used steam. I also found a blog where a lady advised for silk to do a double French fold binding and to NOT press the fold in the binding at all. That is what we did. I think myself and my Mom will do it this way for all fabrics in the future. It came out beautiful and was so easy to fit and to miter.
My first minky backed quilt on the Innova longarm. I used Minky which is a challenge, but it went smoothly. I was amazed.
OMG! My first experience doing a Minky backed lap quilt was awful. I didn’t mind the fuzz or the fact that I had to pin the heck out of to prevent stretching and distorting. I was frustrated with the weight of it, how my machine reacted to it, with all the thread breaks (and I was using strong stuff, full polyester trilobal dragon strength thread). It was NOT fun. And I have this firm belief that quilting should be fun above all else.
This past weekend, it was a totally different experience. I love minky now. Actually I love my Innova longarm even more now! I used the same thread as last time, same minky brand just a different color, same batik fabric and same batting. But this time I used the Innova. Talk about night and day. Only thread problem was when my bobbin ran out. There are no “pills” of thread on the sharp point in the design, the stitching just simply rocks!
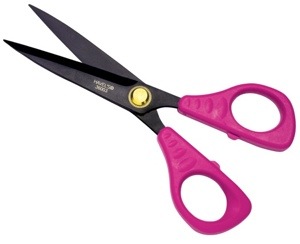
I also love love love the serrated edged Teflon coated scissors I got from Havel’s. They are my goto scissors for all big things not rotary cutter possible. And they make minky cut like butter.
Last week my long awaited longarm finally arrived. After a year of searching and trying out different brands at quilt shows, after months of lurking on such places as the quilt forum, yahoo groups dedicated to the different brands, after calling support phone numbers posing as a customer with a problem to see how I would be treated, I finally decided on an Innova. I also found that there are three other Innovas in my area, so I wouldn’t be alone. Laurie Shook of Kingsbury, TX (commercial longarmer for hire) referred me to the Texas distributor for Innova, Joanne Gemill. I spent a half day with Joanne at Jo’s Quilt Studio in Richmond, Texas, and was convinced my choice was correct. So, I ordered it.
I have been nothing but pleased! I quilted up some el cheapo discount store fabric, just to play, test, and goof up. I tried different thread brands, I played w tension. (Thank goodness I have had tension issues on my other machines, so it wasn’t too hard to get it back to where it needed to be.) I learned the hard way to disconnect the bands that are attached to the computerized motors so I can freehand. If you don’t disconnect them, you can do fabulous horizontal and vertical lines… But curves… Lets say you would have to be Hercules. Once I disconnected the bands, free motion quilting was a dream.
I also learned that they really meant it when they say baste your quilt sandwich. I have to admit, I have done so many smaller art things and its been over a year since I basted anything. I have been saving up my bigger tops until I got the BIG longarm. I put the quilt back on, I laid out and smoothed the batting, I floated the quilt top (small quilt, so didn’t think it needed putting on the roller. ) and I decided to to a digitized pantograph. So it would look nice after binding, I decided to quilt some off the edge. WELL, if you don’t baste… Bad things happen! The all great and powerful Innova Sewing machine head and longarm motors are so strong, that if you are lucky, the only thing that will happen is the machine foot catches the edge of the quilt top and rips your quilt off the leaders. If you are unlucky, and you attached to the leaders in a really strong way, the you rip the quilt top. I was lucky. And I was lucky I decided to use the Red Snappers, for attaching to the leaders. They hold well, but were forgiving enough to let go before my top ripped.
Here is a link to the lady who invented the red snappers, Renae Haddadin, showing how they work.
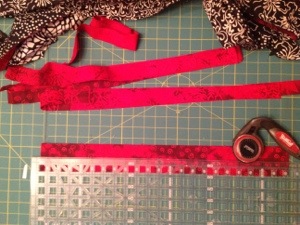
I’ve had two Princess Mirah batik jelly rolls in her red, white, and black color scheme for a couple of years. I couldn’t decide what to do with them. Next week my Innova longarm is arriving and I have been putting together a bunch of tops in advance because I know I’ll go longarm crazy for a few months. Since I need more tops, these two jelly rolls are going to be used today! I have decided to not follow a pattern and just do whatever comes to mind with these.
I started by separating out the red strips, and cutting about a quarter of them in half lengthwise. Then I sewed together randomly chosen strips of black and white fabric strips and inset red a skinny red strip randomly. I just used one red per four of the black and white strips.
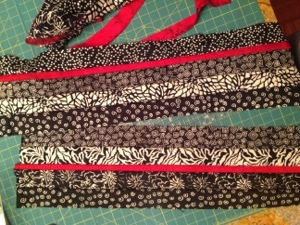
Now I have a slight problem. I only had enough black and white strips to make six of these long units. I want to cut them into squares and I am going to need way more to have enough for a quilt. What to do? I do have a lot of plain black fabric that I was going to use in another quilt back. I think I can use it for smashing on this top. But I need more blacks. So I’ll do,the same thing with the red jelly roll strips and take my last two black and white strips cut on half to do a reverse scheme. That will get me some more coordinating blocks. (I ended up with three units that were mostly red.)
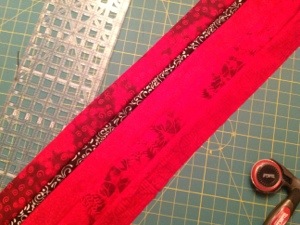
Hmm. I think a bunch of square blocks made up of these units might be boring. So lets chop them up and add a slash of red. I do have all those left over half strips to use up. First I need to figure out what size my blocks need to be. The ends of my striped units are jagged because the lengths of the jelly rolls strips were not the same. The shortest strip was 43.5 inches. 43 minus the selvedges. So I think Imcan get 5 eight and a half inch blocks from each unit. Now I’m gonna be adding some to each block since I want to put random slashes of contrast in them so maybe I can get a little more .nah.. Lets go w five. Off the bat they will be a little taller (9.25) than wide (8.5). But I’ll add more with the slashed and I’ll need to square them up. Let’s see what happens.
I slashed all the blocks randomly at different angles. See the leftover jagged end I trimmed off? Now to sew in some more of the red half strips and see how it looks.
I think its pretty good. It’ll be very interesting when I turn some blocks sideways later.
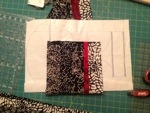
Today, I discovered that my HP inkjet printer will print beautifully on the uncoated side of Reynold’s Freezer Paper.
That means an easy way to replicate designs for appliqué. And, an easy way to do multiple copies of a pattern I made. When I use Rose Hughe’s fast piece applique technique sometimes I want to separate out smaller particles or focal objects to layer on top. Making copies of my pattern with the printer will make this really quick!
I’ve been wanting a larger epson pigment based inkjet for a long time. Now I want one that will accommodate 18 inch wide banner paper too. 18 inches happens to be the width of a freezer paper roll. 😊
 For more detailed information, Please click on this image for a pdf you can save and print. This flyer will also be available in the Texas Art League Gallery; and, in the Watermelon Shop next door if the Gallery is closed.